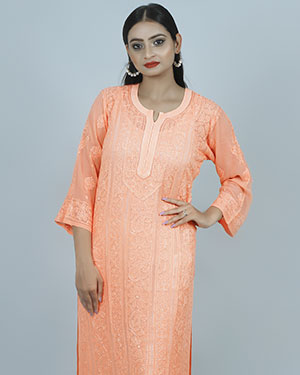
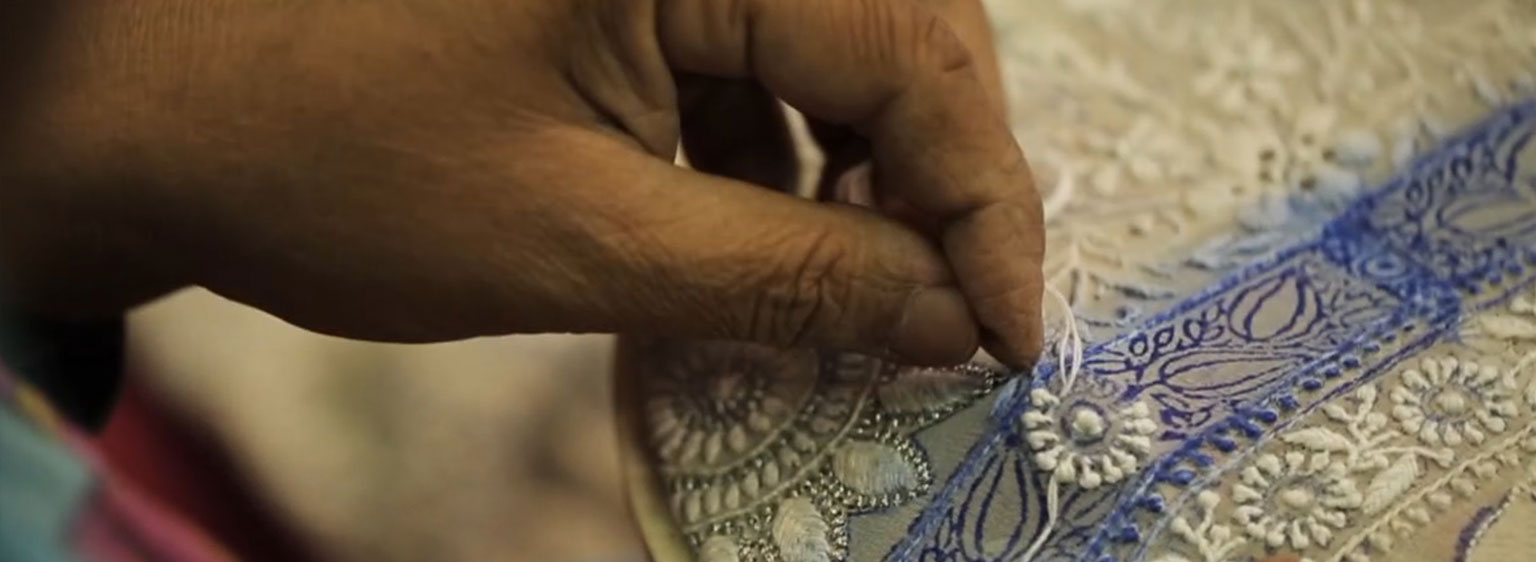
Lucknow’s Chikankari embroidery is synonymous with the city’s heritage. Chikankari is the exquisite needle art work which creates elegance on fabric and converts a simple piece of cloth into a treasured art piece. Previously it was done only on Muslin but today Chikankari has spread its wings on almost all of the fabric including cotton, chiffon, georgette, muslin, silk, chanderi just to name a few, these light and wearable creations do not stick to your body and allow your skin to breathe in the oppressive heat giving a cool and breezy feel. The exquisite needlework has made way for diffusion wear. Cavorting darts in a multitude of threads bring to life filigreed leaves, trellised paisleys, blooming roses and soft jasmines, even Arabesque interpretations of birds, fishes and butterflies.
Done in three main ways, several different stitches are used in this Chikan embroidery; which through their individual excellence provides the ornamentation. Floral and paisley motifs are the most popular ones with jasmine, rose, vines, and flowering stems in the Lucknow Chikan artisans. Creepers are used throughout the garment or just for decoration in the corners. Its charm lies in its miniature size and evenness. These beautiful products of craft and skill are handmade and take several hours to complete. The chikankaars known as Artisans are inherited as a cultural lineage with the skill to breathe life into simple thread and transform it into a Chikan masterpiece. Every piece id handmade and it may take at least 15-20 days to many years in completion of a single Chikan ensemble. Artisans have their signature stitches which they have mastered with several years of practice and dedication. Chikankari has 32 types of stitches, which is categorized into three types depending upon its elevation and appearance:
- Flat Stitches
- Embossed/Raised stitches
- Open Trellis
Along with the distinction in stitches, the count of thread is also changed to vary the intricacy and detailing of Chikankari garment. The finest quality, most daedal, costliest and most exquisite garments involving most laborious and skilful work is done on a single thread, which may be varied to three threads for a lesser elaborate and rich Chikankari work. But generally, thr number of threads can be changed to vary the quality, texture and appearance of the Chikankari stitches.
- Flat stitches:with delicate and subtle embroidery. It will appear as if the embroidery is itself, the texture of the garment. Flat stitches are subtle stitches that remain close to the fabric Here is a detail of few of the most popular Flat stitches:
- Tepchi: This is a long running or darning stitch, the thread is woven along the grain of the fabric in single rows at a time. Thus, a line is formed. Tepchi is used for drawing the outline of a motif. Just as simple joys are enough to fill your heart; this basic design is also used to fill leaves and petals between two parallel lines in a pattern. Sometimes Tepchi is used to make the bel buti all over the fabric. Tepchi is sometimes referred as Tipkhi or Taipchi or ‘Do Rooha”.
- Pechni: What is life without some twists and turns? Similarly in Chikankari too many stitches are twisted or turned with a slight variation to bring out an altogether new stitch. Pechni stitch is one of the easiest variations of the Tepchi. This is created when the Tepchi is covered by entagling the thread that is used over it. This creates the kind of effect that is very similar to that of a lever spring.
- Pashni: Tepchi being the guardian angel comes to rescue of Pashni, as it can be created after the outline of the motif is drawn using Tepchi. This bordered motif is then covered by tiny vertical stitches made of satin that are created over the span of two threads. The chain of favours continues as this is then used in Badla as the inner finish.
- Bakhia: This can easily be termed as the OG of Chikankari. It is also known as shadow work and many stitches are a splitting image of this original stitch. It’s mostly done form the wrong side of the fabric in herringbone stitch and the actual design on the front end is seen as a double outline effect. The shadow of the herringbone stitch is visible from front side to give a shadow effect. It has opaque effect.
Just as we try to elevate our simple outfits by adding accessories, this stitch can also be varied by doing it from wring side as well where it is known as ulti-bakhiya because the crossing threads of a herringbone stitch are visible in the front side.
- Rahet: It is a stem stitch; but just like modern needs nothing simple will suffice, so it is also not used in its original and simple form but is customised. Popularly known as “Dohra Bakhiya”, it forms a neat line of back stitch on the right side of the fabric. Following in the footsteps of Bakhiya it is often used to create outline stitches too.
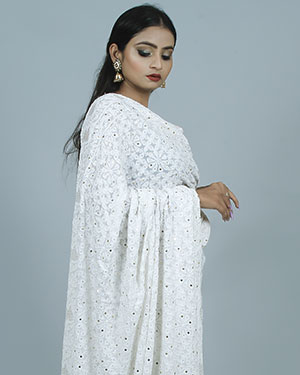
- Khatau: This is the actual definition of ‘Guru Gud reh gaye, chela chini ho gaya’ as it issimilar to Bakhia, but finer, it is a form of applique. The design is prepared on calico, placed over the surface of the final fabric and then paisley and floral patterns are stitched on to it. It is white on white applique work using paisley and floral patterns. It gives different opacity on different places of a fabric.
- Chana Patti: Deriving its detail from its name this is short drawn stitches which gives a leafy look of a tiny leaf of a pea plant. This stitch takes the motto, ‘one step at a time’ very seriously, as this is worked in a fishbone stitch, completing one petal at a time. Bringing the cotton through the fabric at one point and make a small stitch along the centre line of the petal, bring the cotton through again at another point and making a sloping stitch across the central line at the base of the first.
- Keel: In Chikan embroidery the stitch ‘keel’ has derived its name from this beautiful piece of nose pin. To make this stitch, a very tiny stitch is picked up on the fabric with the needle and the Phanda stitch is embroidered. Around this pearl like dot very tiny spikes are embroidered which have a ‘v’ shape on the top of the spikes and it resembles like the gold nose pin.
- Kangan: Just like Kangan beautifies women’s soft and delicate wrists, this too adorns the fabric and makes it appear more royal and elegant. In its myriad designs and manifestations continues to capture the heart of women. This is a decorative band made of gold, silver and studded with precious stones and is of various styles just as we find innumerable styles of bangles. The Kangan stitch is built upon the Keel stitch in centre and little spikes of Kanta beaming out of it resembling a Bangdi (which is a type of elevated bangle). As some people believe in grandeur version of everything, the Bara Kangan stitch is formed if two rows of Kantha (spikes) are embroidered alternatively around the keel.
- Badla: The rescuer Tepchi comes to play again as it is worked to outline a motif. Then just like a kid fills in his picture with colours, the motif is covered with small vertical satin stitches worked over about two threads from the left. Badla is worked on the right side of the fabric, and is used to outline motifs. Giving it a raised look. The threads taken here depend on how fine the embroidered is required to make badla.
- Janjira: In Janjira only chain stich is used to create the outlines of motif. It is also used as filling stich. A small extremely fine chain stitch, it is used to finally outline the leaf/petal shapes after one or more outlines have been worked.
- Embossed stitches:Just as Chikankari raises the style quotient and richness of your wardrobe, embossed stitches too are raised from the surface of the garment. Various techniques are used to achieve this elevation from the surface which cuts the monotony of the surface texture of the garment.
- Ghass Patti: As the name denotes ‘Ghass Patti’ (grass and leaves), this stitch was inspired by nature and the filling of the embroidered leaves look like delicate leaves and willowing grass. When it is worked with white on white it appears like the feathers of a swan. This is a back stitch; it starts from the pointed end of the tracing of the pattern, especially if it is a leaf or petals of flowers that has to be covered with embroidery. The stitch starts from the top working downwards, taking small alternative diagonal stitches worked to the centre line.
- Phanda: This is popularly known as ‘chikana phanda’ and it resembles like a French knot. Phanda is an inverted stitch or a tiny stitch, picked up by a needle on the fabric repeatedly on the same spot till it becomes a smooth knot, and looks like a little pearl. This stitch is quite time consuming but very pretty when used in the centre of a flower or around a butti.
Kacha phanda has the same technique as the above mentioned stitches, the only difference being, that the stitches taken on the same spot are few and it give a flattish appearance. Phanda resembles millet and gives a raised effect as it falls under the knotted style. This stich is used to fill petals, leaves, etc.
- Dhania Patti: This stitch is the same as the phanda. ‘Try and try again until you succeed’, Dhania Patti takes it quite literally because a stitch is repeatedly picked up on the same spot till it look like a dew drop and on top of this dot one single spike is embroidered thus giving it a look of a cumin seed or “Dhania“ as the name denotes.
- Murri: Murri is typically an oval shaped French knot that creates an embossed effect on the fabric. Just as the greatest blessings art hidden in the most smallest of details, this rice shaped stitch has the thread forms numerous stitches in the shape of rice grains that could be best described as a minute form of satin stitch. The embroidered areas of the cloth rarely exceed one eighth or sometimes one sixteenth of an inch in width extended in the desired direction to form a design. This is also called Lambi Murri.
Another variant of the Murri is the Gol Murri that has the same technique as above, the only difference being it is round in shape.
- Dhum patti: This is quite similar to Upari Bakhia, the process of manipulation of the needle on the fabric is concerned is the stitch named Dhoom. In this stitch the threads crisscross each other on the right side of the fabric and the effect is different from the Bakhia stitch. The criss crossing look of Dhum patti is very appealing and gives a royal look to the garment.
- Jali work:‘Parde me rehne do parda naa uthao’ the Jali work justifies these lines of a very popular song. In Jali work a window or Jali is created by making minute holes in the garment. An effect of drawn thread is achieved without drawing any threads. The stitches taken are very small and the hole formed is 3/16th of an inch.
In Jali work holes are made in the fabric by teasing the warp and weft yarns and holding them in position by small stitches to give it a net effect. ‘Ishq aur Mushq chupaye nahi chupta’ just like that Jalis reveal the underneath skin or coloured fabric to give an accent of colour to alternate white of chikankari.
Inspired by this lace art and the ‘jali’ designs taken from the old buildings especially from Lucknow and Jaipur where windows and railings are mostly done in intricate jalis. In the true jail work, however which continues to be practiced even today, the thread is never drawn.
There are various kinds of jali, but the technique is the same, each jali is made in different patterns. Some of the most popular Jali are:
- BANGALA JALI: ‘Kabhi band kabhi khula’ In Bangla jali the squares holes are smaller than Madrasi jali and the holes are alternately opened and unopened in parallel bands. It is popularly believed that the Bengali and Madrasi (also known as Mandrazi) jali were clearly bought from Bengal and Madras and probably modified to suit Chikankari.
- CHATTAIYA JALI: In Chattiya, the jali is opened in the same style by holding the weft and the waft apart, but mat like patterns are formed in the net.
- MAKRA JALI: Or the spider web, the jali is opened about 1/16th of an inch in a circular pattern and the centre is left unopened giving it a look of a web. This is repeated till the open spacing of the flower is filled with this Makrajali. This looks very beautiful on garments.
- MANDRAZI JALI: This jali is the most intricate among the others. Here one hole is opened ‘about 1/16th of an inch another is left unopened, another is opened in four parts and the next is again left unopened. The pattern is thus repeated. This is again repeated thus creating an interesting texture.
- SIDDAUR JALI: Siddaur jali is the most common jali in Lucknow chikan kurti; in which the stitches are worked diagonally the warp and the weft threads, in rest of the jalis the stitches are worked on the weft and the warp. This is different from the other Jali and hence the effect it creates is a unique one.
- BULBUL CHASHMA: This jali seems to be compound of the siddhur and the makrajali. In the alternative rows there are the siddhur like opening ascending vertically. In the other rows are square holes with diagonally intersecting threads. This jali also appears very delicate. All the jalis are worked from the reverse side of the fabric.
- HATHKATI: Another form of jali stitches to form a row of square holes is known as hatkati. This can be seen around the borders of handkerchiefs, centres of flowers and petals, in gents’ kurtas on the neck and the shoulders.
Hath Kati is of two types, the single, when the jali is made from one side only and the second type is when the jali is worked from both the sides. Also known as Bank jali there is a slight difference in their look but double jali takes more time and gives a finished look.
- Hool: is a fine detached eyelet stitch. Worked with six threads it forms the heart of a flower. It gives an appearance of an isolated jali. Combination of great things gives a brilliant output and hence this is a combination of the button hole stitch and the long satin stitch. The weft and the waft threads are so teased apart and held back by a long satin stitch that a hole is formed in the centre of the wheel. The spokes of the wheel are encircled by a continuous row of minute stitches. The motif is called ‘hool’ which presumably may be a colloquial dissertation of the word hole.
- Daraz: It has a near resemblance to appliqué, as the technique is similar. It is used for attaching a strip of fabric on the reverse side and there are three main designs in this style.
- TARA PATTI: Star like flowers with leaves. This is inspired by nature as we see curved stem and flowers like a creeper running horizontally or vertically on the fabric. These tracings are cut neatly along the lines and finely hemmed in giving the impression of ‘belbuti’ running across the fabric. The center of the flower has a very small hole made like rozan with a needle that breaks the monotony of the fabric hemmed in.
- NEEM PATTI: This is same as the Tara Patti, the only difference being it is in the shape of elongated leaves. These strips are neatly attached in a straight line, but the finished product looks like repeated curved bel running on either side of the kurta and the joining of the strips are invisible.
Daraz is time consuming and there are only few workers of this art. Other types of Daraz are Tikoni that has three points. Salemi, Akara salami, and Akara Patti, These are named after the shapes of the block but the technique is the same for all of them.
- FISH: The three types of Daraz are done in the same technique except the shape changes. The fish Daraz is are the most fascinating among all of them. One fish follows the other in slight curves {but the fabric as mentioned earlier is joined in a straight line} and it appears to be that they are swimming in water. Fishes have been integral part of Awadh architecture, besides fishes being embroidered in Daraz pattern; there are embroidery blocks of fishes in various stitches in Chikan.
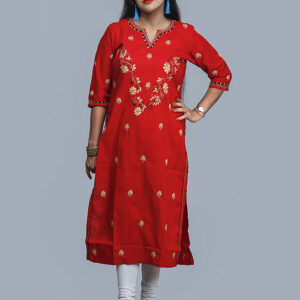 Chikan Kurti 1
1 × Rs.1,099.00
Chikan Kurti 1
1 × Rs.1,099.00 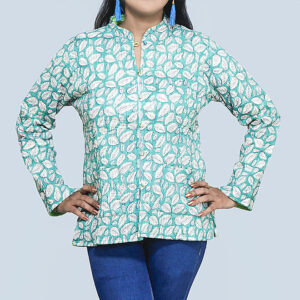 Chikan 4
1 × Rs.725.00
Chikan 4
1 × Rs.725.00  Powerbank 1130 mAh Blue
1 × Rs.210.00
Powerbank 1130 mAh Blue
1 × Rs.210.00